Wednesday, February 22, 2012

DIY Bench no. 2.

I've been spending a lot of time looking at bench designs as we need one for our 'hallway' by the door. It's the first thing I've really designed and built from scratch so the process has been a really good experience. 

As always, I made alterations and tweaks along the way such as changing the distance between the slats (wider as you move away from the centre) and leaving a gap between the end of the slats and the frame. I also made good use of the table saw again, cutting a step out of the top piece making a ledge for the slats to sit on and for cutting mortices in the bottom pieces. The materials cost about US$15.


The two iterations of the design in Sketchup (this one has more slats and is slightly longer)


The shed and table saw set up.

It's great to be woodworking outside on days like this

The frame pre-oiling. (Very messy shed, I know) 
Test assembly success!


After the stain/seal had dried

Here you can see the mortices are staggered: 2" and 1" deep and the opposite on the other side


 If you are interested, check out my mid century modern furniture business Trystcraft . I find, restore, refinish (no chalk paint!) and repair mid century modern furniture and ship it worldwide.


Sunday, February 19, 2012

A (not so) slippery slope

Part of the building inspector's checklist required us to stabilize the slope behind the house. I had a great time moving the + 200lb railroad ties (sleepers in UK) end over end into position at the base of the slope, then strawed (for the purpose of this blog it's a verb) the bank to reduce soil erosion. The two were definitely a visual improvement and the gravel was like a lick of new paint.

Straw, railroad ties and gravel. 
I like the way the gravel highlights the roof overhang after rain.

Now we need to get the grass seeded.
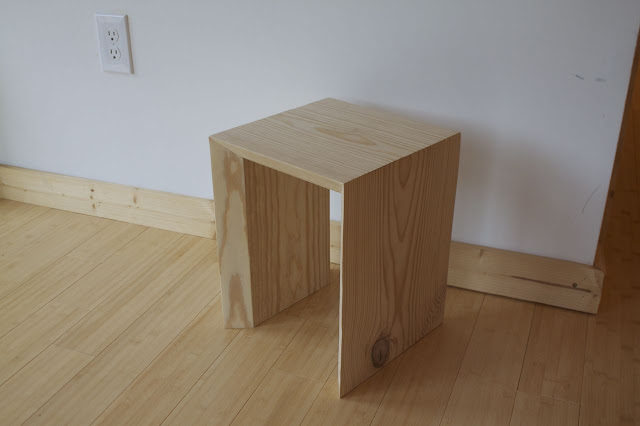
 I got a table saw for my birthday has meant I've been spending lots of time learning how to use. It's great to be able to get accurate cuts, angles and bevels and to be using wood thats wider than a 2x6. Here is a little stand I put together from some scraps:


Monday, January 16, 2012

Finishing touches...

I finally finished the underside of the roof today, after a long process of framing out between the rafter, attaching 2x4s to nail to, cutting and hanging plywood and last of all cutting the metal trim on the fascia. We are very happy with the finished look and it makes a big difference. 


The pond froze for a couple of days in early Jan.

The catfish we put in in May are doing well, I caught this one this afternoon.

My reward after finishing the roof - fishing time! (Note grubby jeans as proof of hard work completed)


In winter, some trees have leaves. Other trees don't. Fact.

I did some vista pruning and also played around with some of the logs we used when we were sealing our siding.

Sunday, December 25, 2011

Planes, geese and roofing.

Here are a couple of images from the last month or so. We've had biplanes, mass geese migrations over the house and lots of ladder work. Merry Christmas everyone!


Framed out before putting up the plywood and face plates

First section on


All done


First front over master bedroom

2nd bedroom done

A morning panorama 

Saturday, December 3, 2011

Heading towards winter

We've been getting frost on a regular basis and the deciduous trees are down to their skeletons. I really like how much the landscape opens up and reveals hidden spots in our area.

The seasonal shift has brought our friendly neighbourhood beaver back to the pond and he/she seems relatively unbothered by my regular traipsing round the pond trying to get some photos. I caught him in a lazy moment as he was tanning on the pond's edge - I think he put off going back in the cold water as long as possible.


We also saw a new deer investigating the pond - the first buck with antlers I've managed to get a photo of.


The changing light has made the area even more photogenic in a way. I've made use of a panorama compiling program called 'hugin' - I highly recommend it - it's free! Below are some panoramic shots and some others that came out well. Click on an image to view it full size.


Wednesday, November 9, 2011

DIY furniture take 3: A George Nelson bench

Recently, I've been using the tried and tested excuse of DIYers everywhere ("I've got the time and we could save a lot doing it ourselves..."), I've tackled building another piece of furniture for our wonderful but oh-so-sparsely-furnished house. This was a bit of a jump from my last projects which consisted of:

1. a cat-scratch pole

Silka was a very obliging cat-scratch pole model.

 2. a very rustic (read rough/clunky) dining table,


... I chose the ambitious goal of building a 4' George Nelson bench, an iconic design which is on sale for US$300-$800 new, depending on which source you buy from.

Altogether I spent about $70 on materials and some $60 on new tools, sandpaper and polyurethane to finish it.

It was a serious learning process and I had a couple of false starts, made some adjustments and took my time. It's far from perfect but I'm very pleased with the results.

 If you are interested, check out my mid century modern furniture business Trystcraft . I find, restore, refinish (no chalk paint!) and repair mid century modern furniture and ship it worldwide.


The legs just after the stain/seal had dried.